How Can We Help?
Region Of Interest CV
Introduction
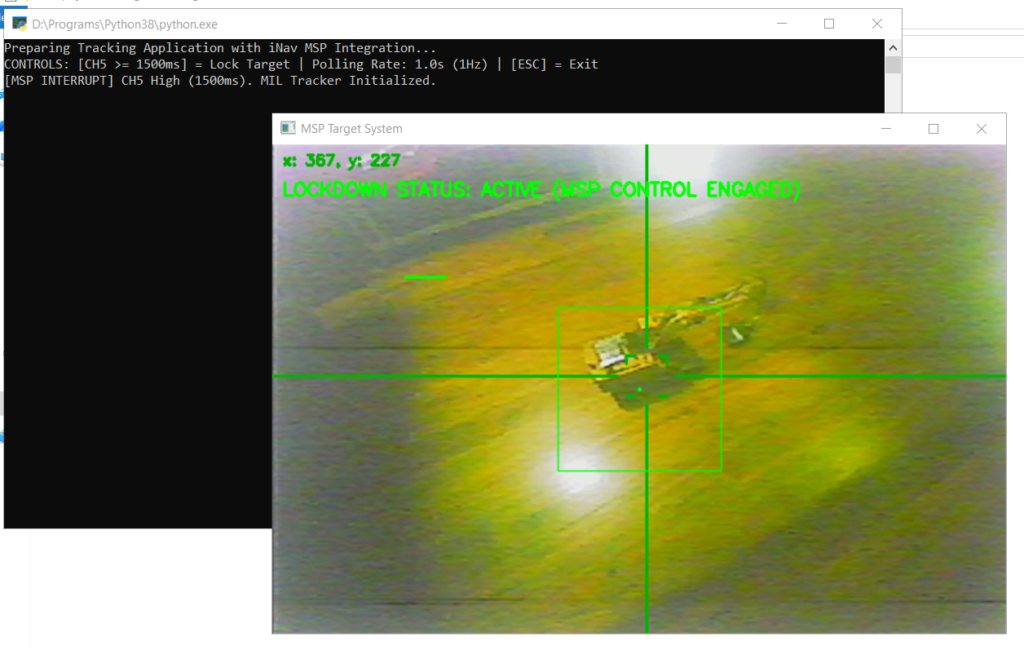
Sometimes your Target Subject if moving too often making to difficult to aim the whole drone vehicle to track. in this case an Region of interest moves the Targeting from Aiming the whole drone vehicle to clicking on the mouse , hence the Target subject can be anywhere position on the screen and the drone would automatically align to center on its own.
this also can be used as Navigation allowing the drone to move to the area of interest by selecting an subject or a terrain from what it sees
- Left click to Lock on ROI target
- Right click to disengage from ROI Target
Setup
installers are provided on the download file Python-install-requirements.bat and the app MainROICV1.py
Targeting system
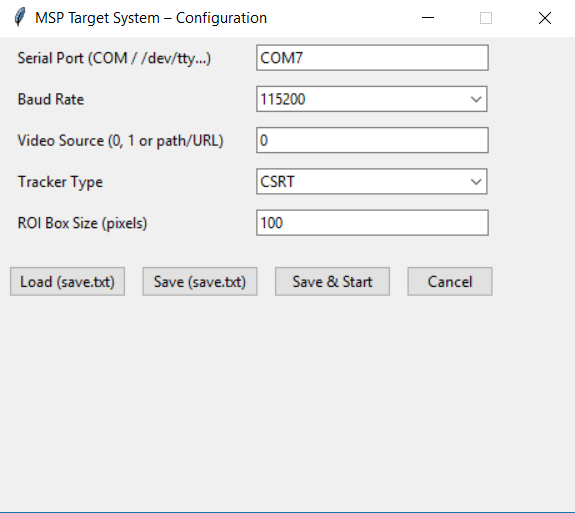
Serial port – COM#
Baud Rate -Data speed
Video Source – 0,1,2 for OTG webcam or http://192.168.1.1:81/stream? for IPC
Tracker type
Overview of MIL, KCF, and CSRT
- MIL (Multiple Instance Learning): Uses machine learning by evaluating a neighborhood around the object’s current location rather than just a single positive sample. It handles moderate movement well, but it is slower than KCF and struggles to recover from full occlusion.
- KCF (Kernelized Correlation Filters): Built on a foundation of correlation filters, operating significantly faster than MIL by exploiting properties of circulant matrices. It is ideal for high-speed, stable, single-object scenes, though it does not handle full occlusion or rapid shape deformations well.
- CSRT (Discriminative Correlation Filter with Channel and Spatial Reliability): Uses spatial reliability maps to adjust the filter support to the object, making it effective for non-rectangular regions, scale changes, and rotations. It is more accurate and robust than KCF, but runs at a lower frame rate.
ROI Box size – this is the size of your target Gravity
after Saving you can run the app it should automatically connect the Drone’s bluetooth telemetry and camera if done correctly
INAV setup
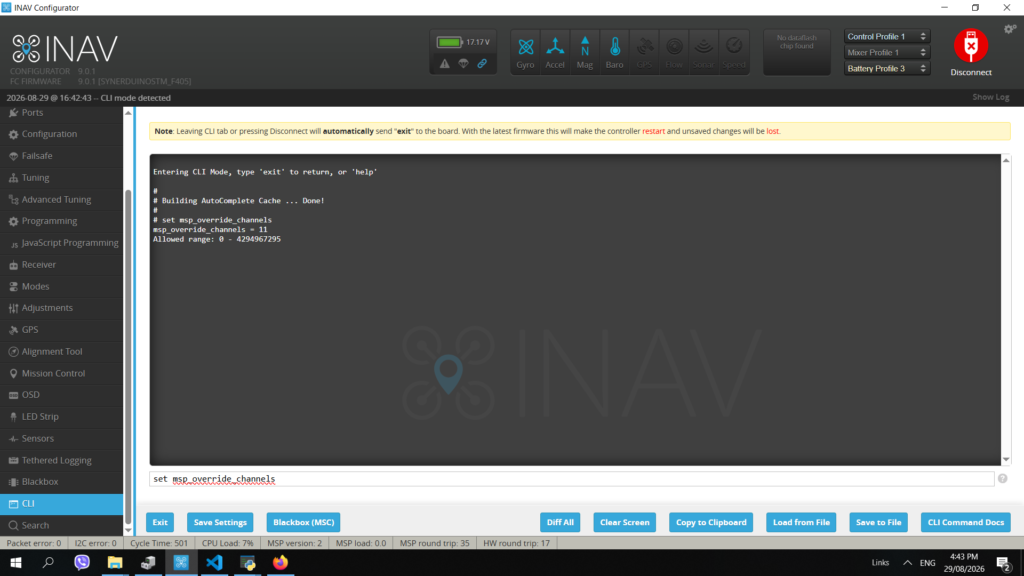
to interface with INAV you need to override the MSP input which your computer send via serial
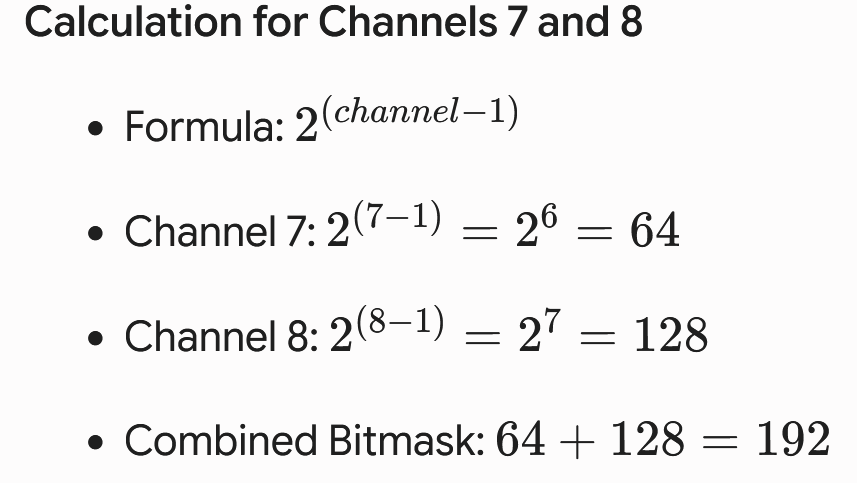
To override channels 7 and 8 using MSP commands in INAV, you need to calculate the correct decimal bitmask value for the msp_override_channels CLI setting. INAV uses a 16-bit integer bitmask where each bit represents a specific RC channel (Bit 0 = Channel 1, Bit 1 = Channel 2, etc.).
EXAMPLE: Calculation for Channels 7 and 8
Enter the following command to set the override mask:
set msp_override_channels = 192
- Type
saveand press Enter to reboot the flight controller. - Ensure you have mapped and configured the MSP Override flight mode to an auxiliary switch on your physical transmitter so you can toggle the override state safely in flight.
Note: For MSP override to function properly, your companion computer or external device must continuously stream MSP_SET_RAW_RC data at a rate of 5Hz or higher.
EXAMPLE: Calculation for Channels 1,2,3,4

Enter the following command to set the override mask:
set msp_override_channels = 11
- Type
saveand press Enter to reboot the flight controller. - Ensure you have mapped and configured the MSP Override flight mode to an auxiliary switch on your physical transmitter so you can toggle the override state safely in flight.
Note: For MSP override to function properly, your companion computer or external device must continuously stream MSP_SET_RAW_RC data at a rate of 5Hz or higher.
CLI setup
msp_override_channels inav override channel 2 and 4 Pitch and Yaw
set msp_override_channels = 6
msp_override_channels inav override channel 7 and 8
set msp_override_channels = 192
msp_override_channels inav override channel 1,2,3,4 Roll , Pitch, Throttle ,Yaw
set msp_override_channels = 15
msp_override_channels inav override channel 1,2,4 Roll , Pitch,Yaw
set msp_override_channels = 11
msp_override_channels inav override channel 7 , 8 , 9, 10
set msp_override_channels = 960
msp_override_channels inav override channel 1, 2, 4, 7 , 8 , 9, 10
set msp_override_channels = 971
Setup modes
on the modes tab look for Misc modes , we recommend to set a 3 position switch one to arm the tracker and another to take over RC MSP
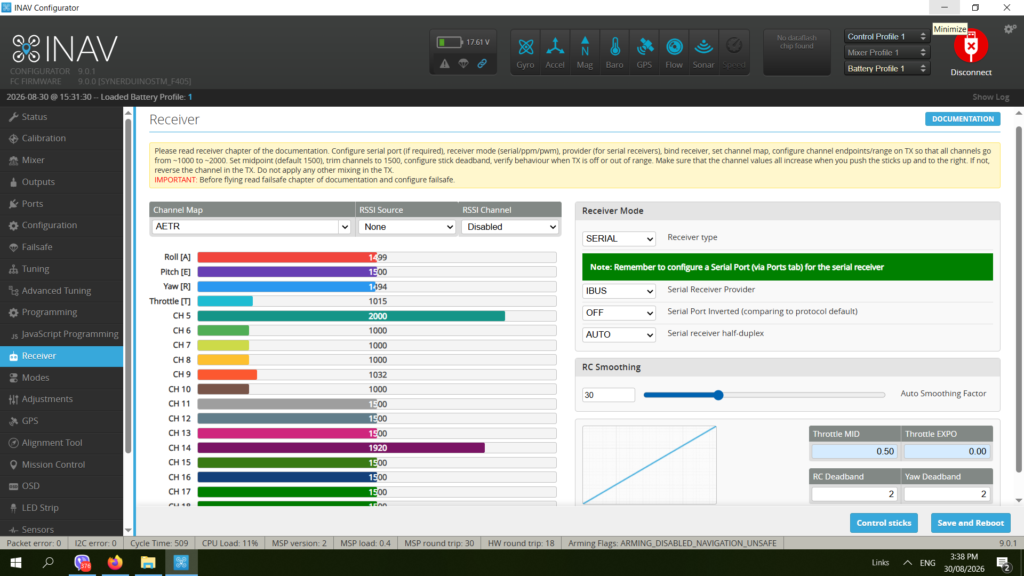
the code set is MainTargetCV1 on to Channel 5 => Equal or Grater than 1500 to lock to object ()
on INAV Misc modes MSP RC override is set to 2000
this to ensure that ones lock is confirm on position 2 switch then Position 3 switch transfer control to computer from pilot
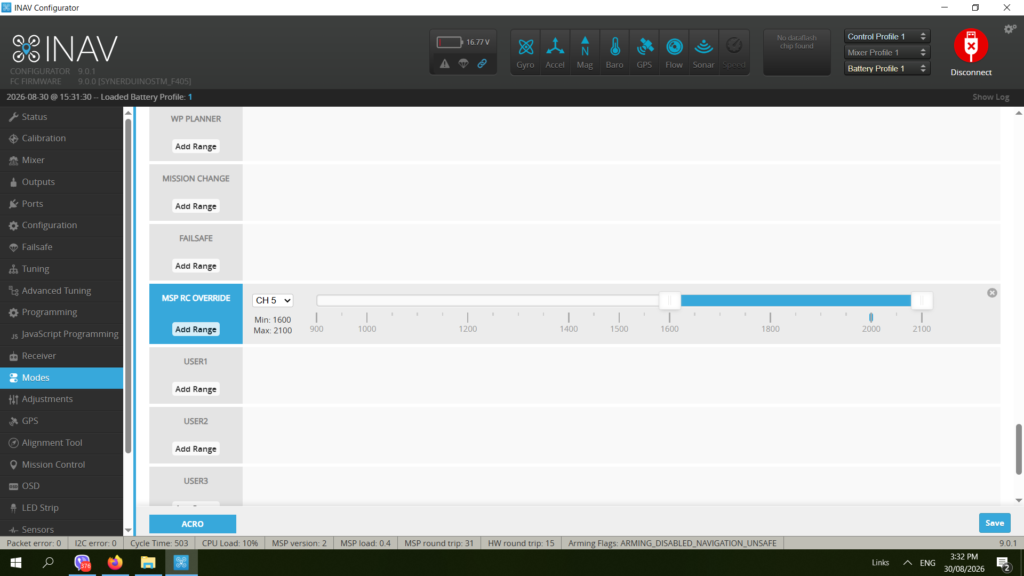
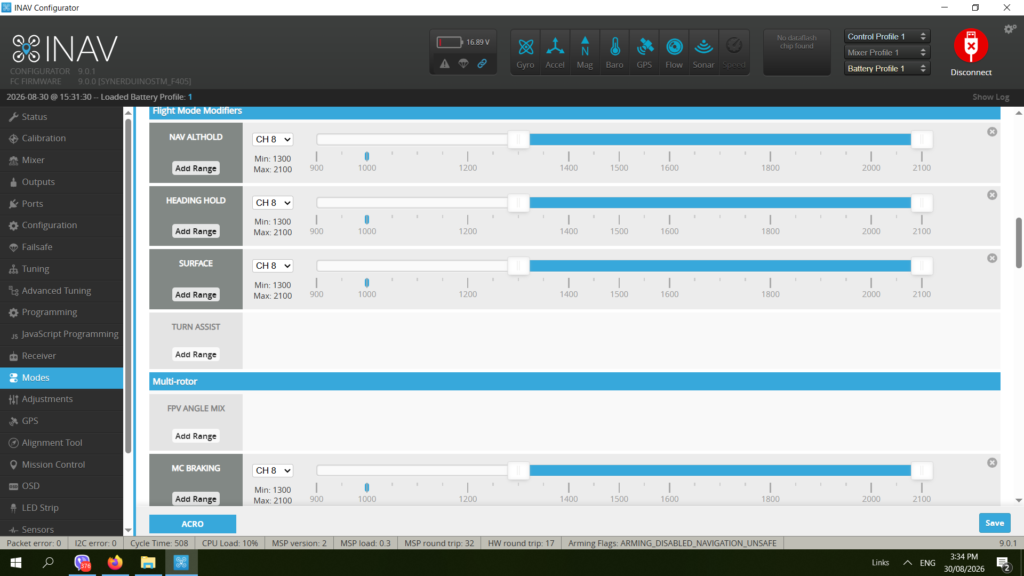
Other modes are active on other channels to support the AI systems
NAV Alt Hold – hold altitude Ch8
Heading Hold – Ch8
Surface – Ch8 only to be use for Terrain elevation following requirements (Optical flow hardware require) turning this off revert the drone to Baro Altitude.
MC Braking – 8Ch (you need to stop somehow when object is near)
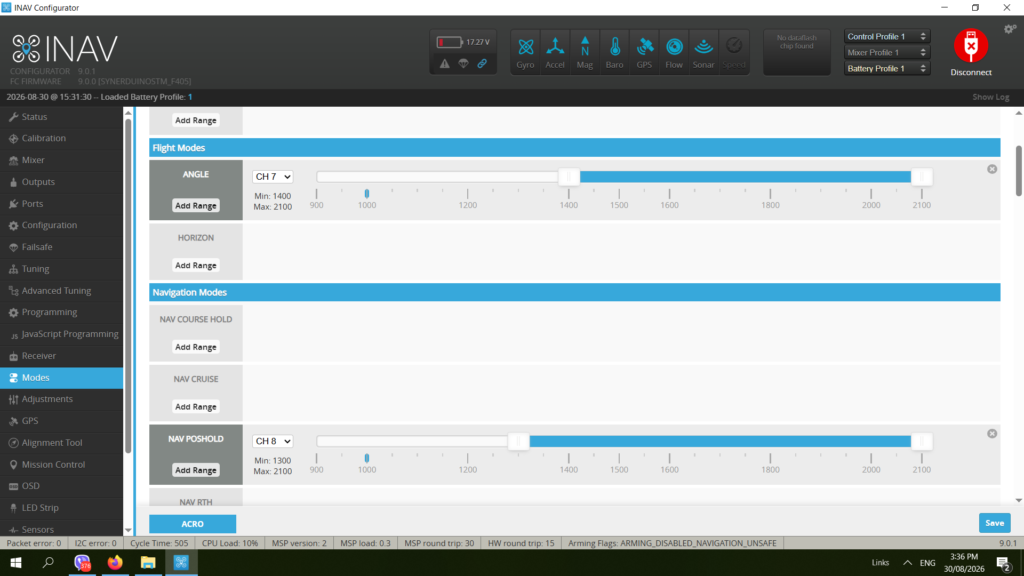
Angle – Ch7 Keeps Drone Level – this also can be same mode as Arming .
Nav Position – Ch8 Hold drone in place works both in GPS and Optical mode
at this point you can plug a physical USB to the flight controller and go to receiver to see if the controls are responding to the remote
on app run you would be able to see an unarmed lock down status
when object is Left click selected the ROI box is created on the object
Once confirm a Lock then Channel 5 can be fully engage to transfer controls to computer , check your Receiver to see if Yaw and Pitch is responding to the input
take care on your first flight be ready to turn channel 5 off to disengage when drone is not behaving correctly and go thru the codes and settings again
RC expo rate can play a part is drone responds behavior

